Memberships
How To Customize Membership Settings
In this article, you will learn how and how you can customize your membership settings.
Part 1: Where to edit
To edit your settings: Go to Sites > Memberships > Settings
Site Details: Control the branding and the SEO settings of your Sites
Custom Domains: Setup your custom domain n your membership sites
Email Settings: Customise your email settings
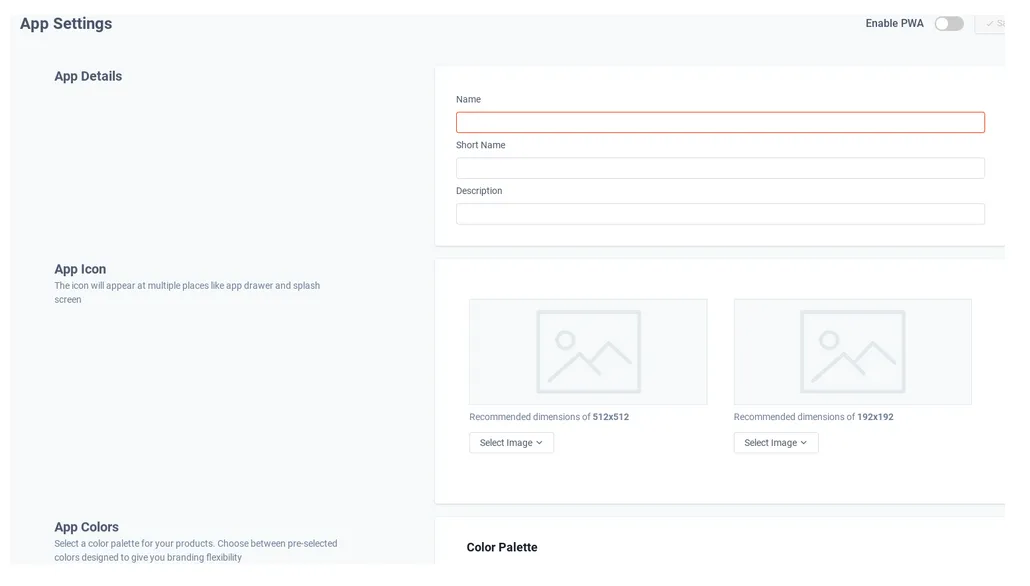
App Settings: Customise the experience of desktop and mobile progressive apps
Part 2: What to edit
On the Site Details section:
- Title
- Subdomain
- Support email
- Support Phone Number
- User Magic Link - This is for you or your users, to send you directly to the membership
- Learner Magic Link - This is for your contacts, you can send this in an email through workflow or conversation
- Branding: You can edit the logo, and the Favicon here too.
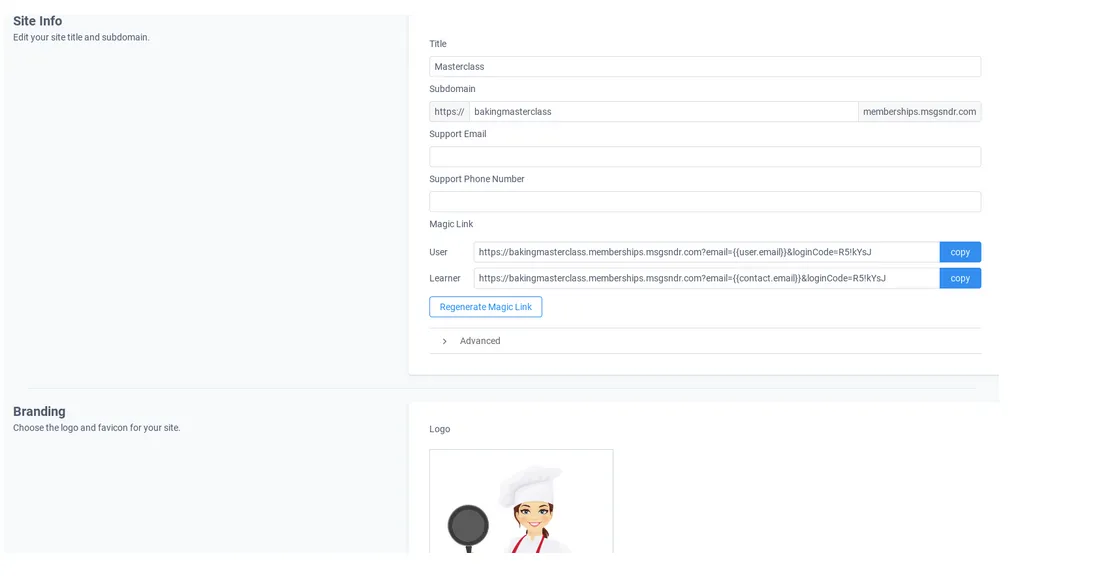
Note: The magic link will send them straight to their membership without having to create a password first.
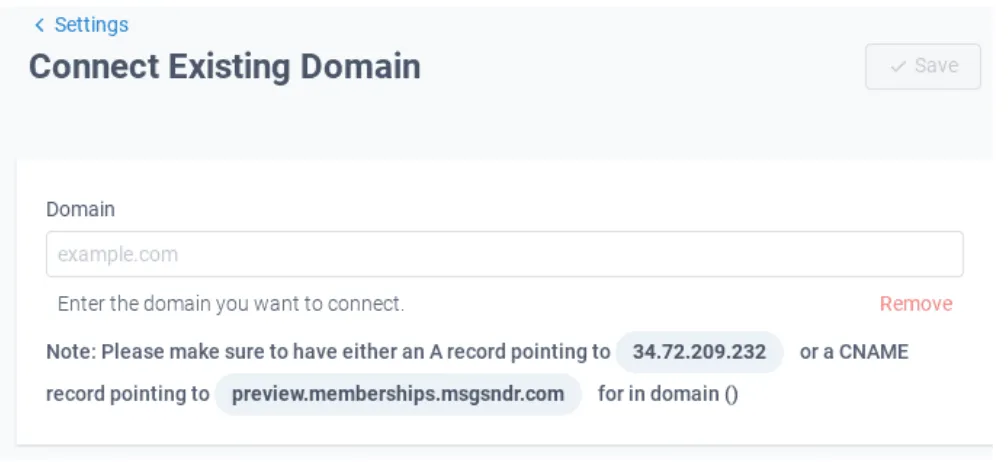
Connect Existing Domain
Enter the domain you want to connect to here
Email Settings
- Send Welcome Email: You can select the default template or use one of your own. You can turn this feature on or off.
- Send Drip Email: Send them an email when a new category is available. You can use the default one or one made by you. You can turn this on or off.Send Offer
- Access Email: You can send them an email when the offer access is provided. You can use a default template or use your own. You can turn this feature on or off.

App Settings: You can edit the name of your app, and give it a short name and a description. Also, add an app icon. You can also select the app colors.
CONNECT
Reach out to us!