Memberships
How to Build and Edit an Offer in Memberships
In this article, you will learn how to build and edit an offer in a membership.
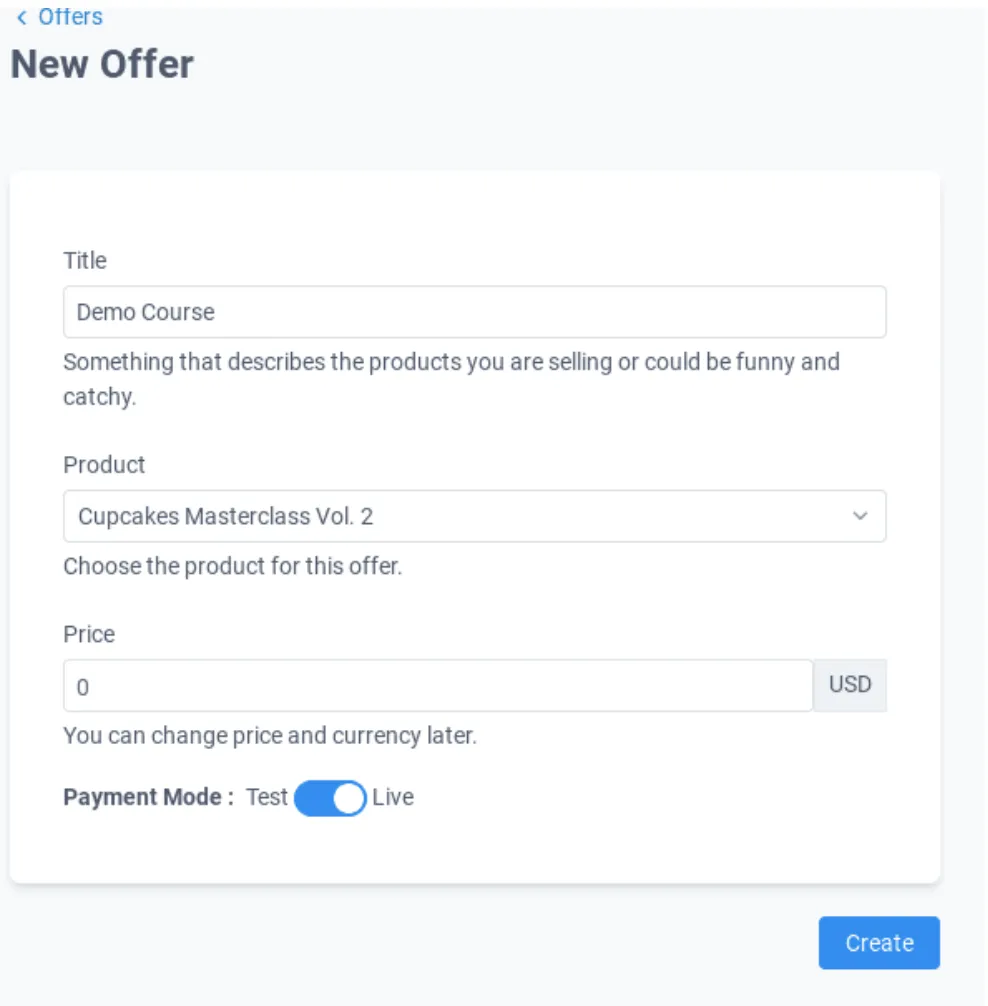
Step 1: Create your offer
- Navigate to Sites - Memberships - Offers - Create Offer
- Give a title to this offer, connect it with a product, and give it a price.
- Leave this with the toggle on Live if you plan to collect real payments
- Save
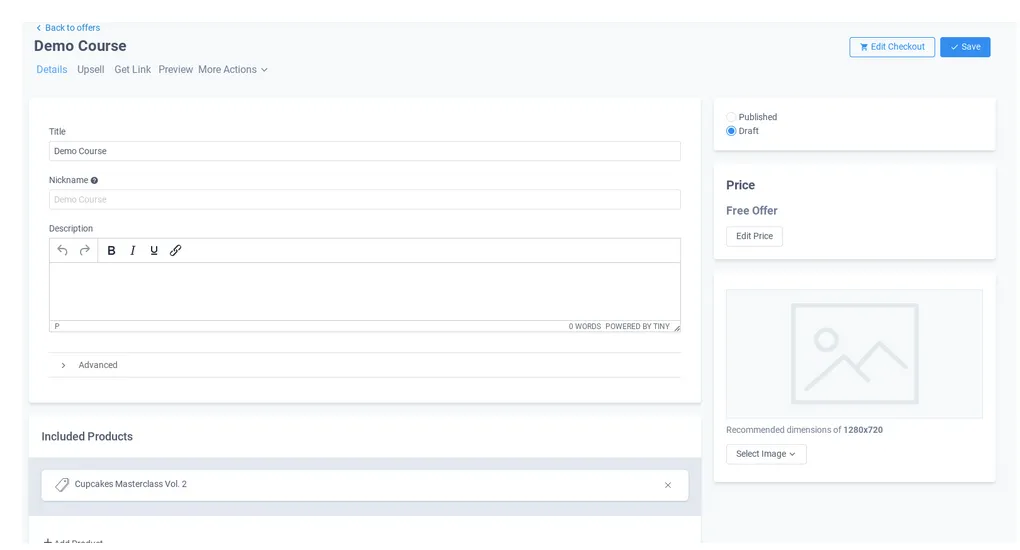
Step 2: Build your membership
- Edit the title if needed
- Give it a nickname if you want (this will only be visible to you)
- Add a description
- In case you need to, you can add custom JS, CSS, and/or tracking code.
- Make sure you have selected the proper product (or products) On the section on the right, you can set this to draft or published
- Edit the price (if it's free, a one-time payment, or a recurring subscription)
- Add the image that will be displayed next to your course
- Save
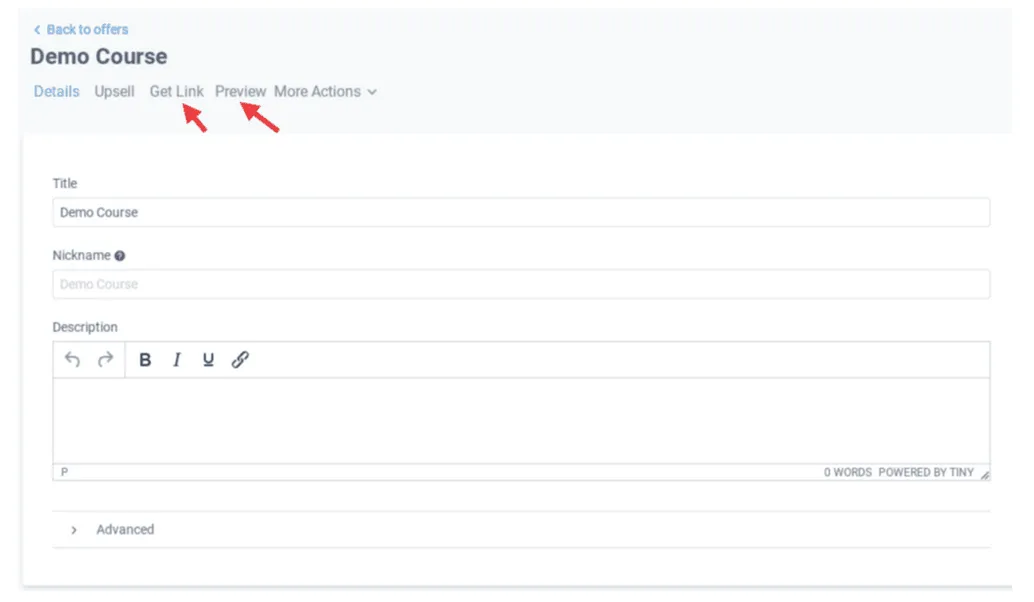
Step 3: Preview your membership
Click the preview link to see how your offer would look likeIf you want to share your page with others, click on the Get Link text to grab a copy of the URL
Note: In preview mode, the Track Progress and Mark as Complete features won't work, since you are viewing everything from a preview perspective. To test this, you will need to create a test contact, give yourself the offer, and access the membership as if you were a regular customer
Step 4: Complete the Setup and View your Course
- When you finish editing the checkout page, click on save
- Navigate back to offers and see what you created.
CONNECT
Reach out to us!