Client Portal
How to set up your client portal?
We have implemented a robust client portal system for you on our dedicated subdomain, clientclub.net. This portal facilitates effective interaction between clients and their associated accounts.
However, during the setup process, we offer a flexible feature for each sub-account to personalize its portal by selecting a unique custom domain. This customization allows you to reinforce your branding and enhance your client's familiarity with the platform.
Configuring a custom Domain:
To configure a custom domain for your client portal, follow these steps:
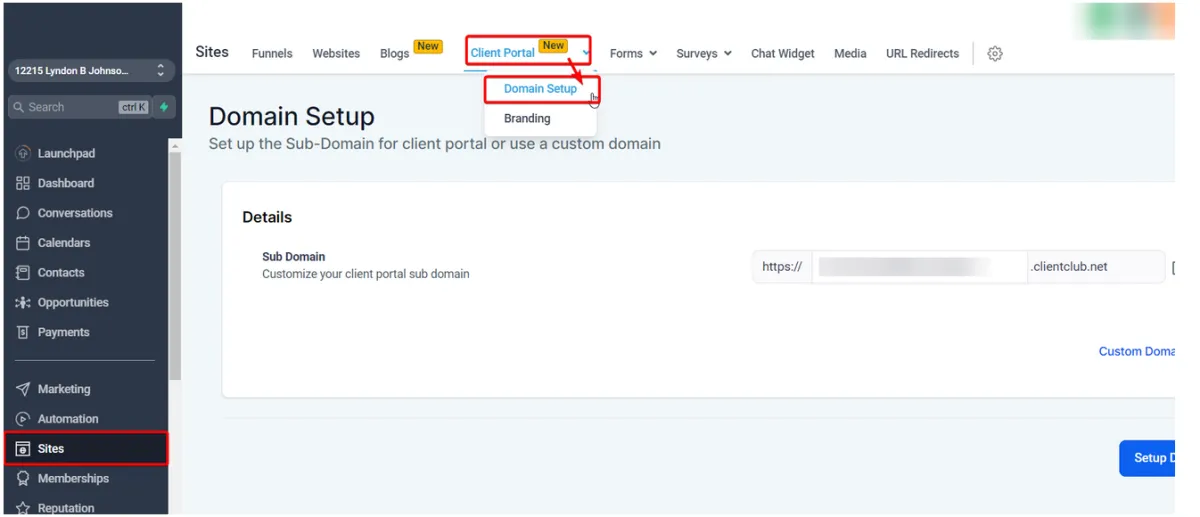
Using the left sidebar, navigate to > Sites tab then > Client Portal section.
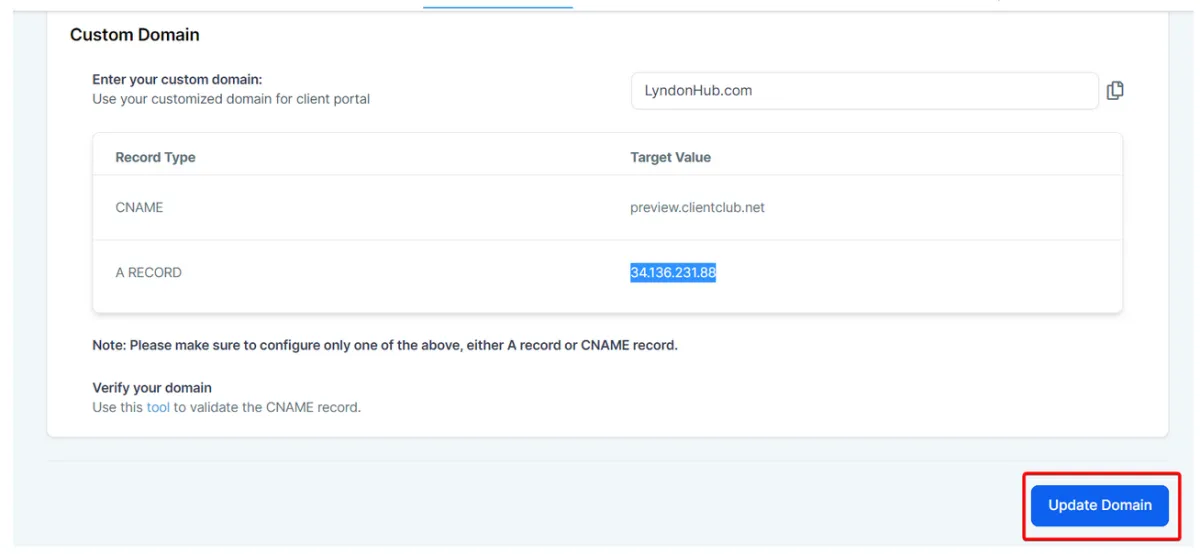
Proceed to the "Domain Setup."area.
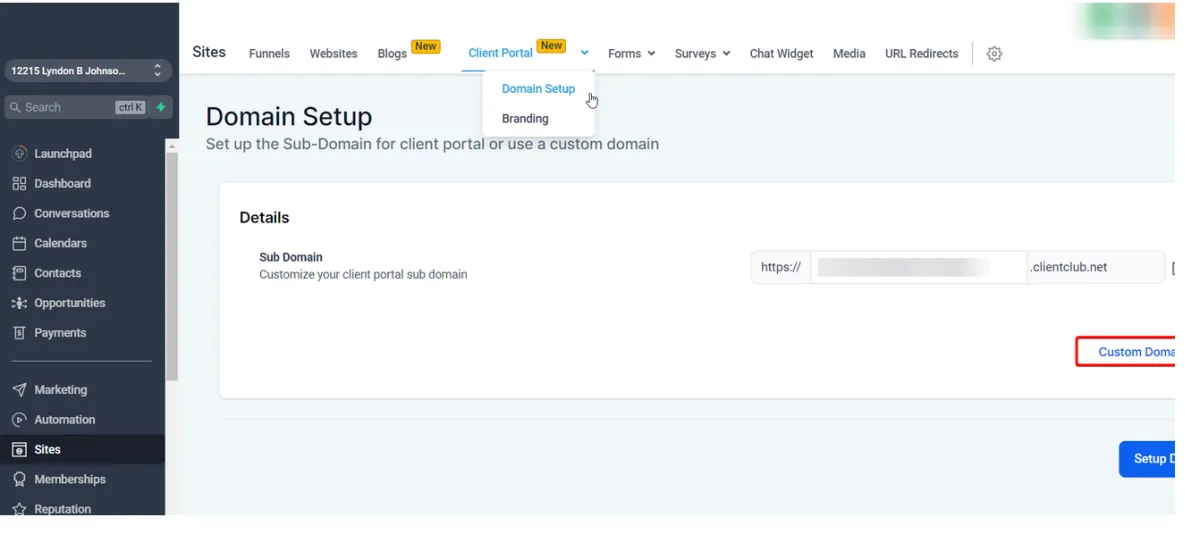
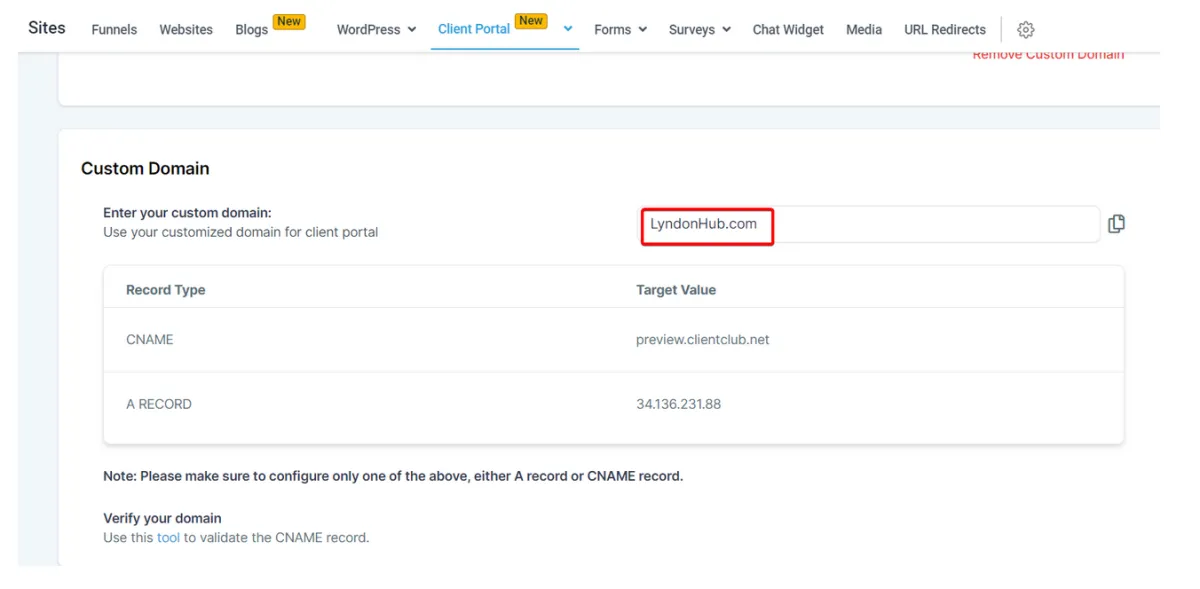
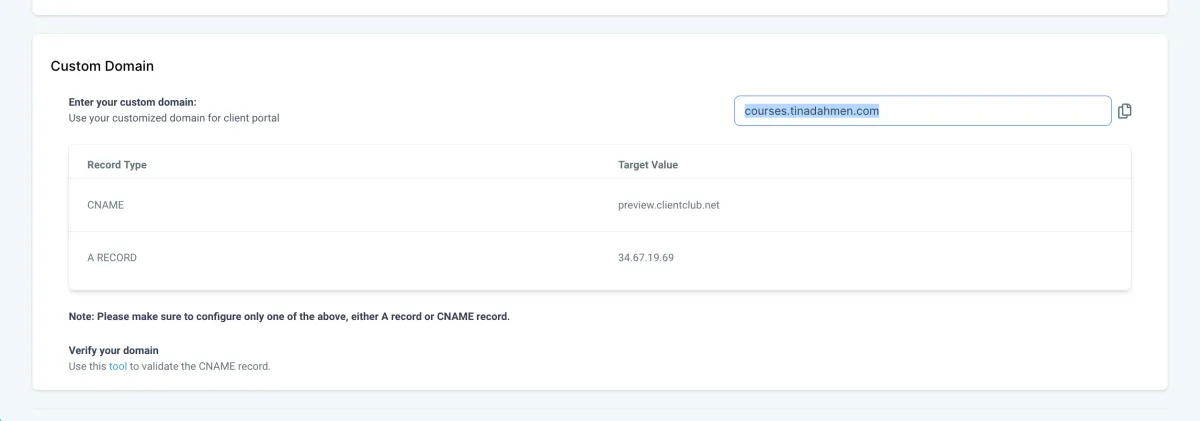
Click on the option for a Custom domain and input your desired domain name.
Please note:
While the following resources provide a good general overview, the exact time of DNS propagation can vary due to several factors, such as the TTL set for the DNS record, your ISP's update frequency, and geographical factors.
Typically, it is suggested to allow between 24 to 48 hours for DNS propagation.
GoDaddy: "What factors affect DNS propagation time? | Domains"
AccuWeb Hosting: "How long Nameservers propagation could take after ..."
Namecheap: "DNS Propagation – Explained - Domains"
Webcentral: "What is the standard DNS propagation period?"
CONNECT
Reach out to us!